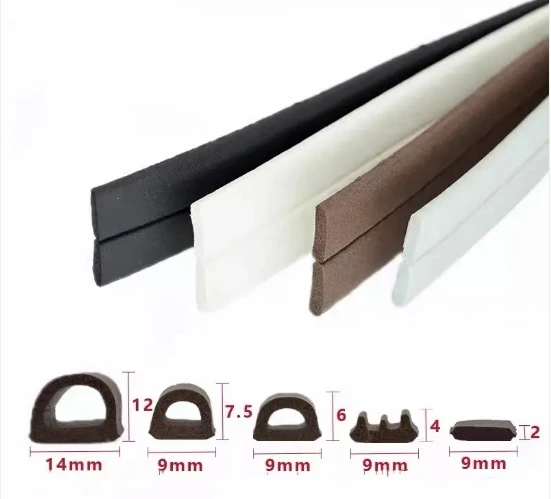
chef oven door seal replacement
Replacing the Seal on Your Chef Oven Door A Step-by-Step Guide
If you've noticed that your chef oven isn't maintaining temperature as effectively as it used to, you might have a problem with the door seal. A damaged or worn oven door seal can lead to heat loss, resulting in longer cooking times and increased energy consumption. Fortunately, replacing the seal is a manageable DIY task that can extend the life of your oven and improve its efficiency. In this article, we'll walk you through the steps to replace your chef oven door seal.
Why You Should Replace Your Oven Door Seal
Before diving into the replacement process, it’s essential to understand why a properly functioning door seal is crucial for your oven. The seal ensures that heat is maintained within the oven, allowing for efficient cooking. A compromised seal can lead to uneven cooking, burnt edges on your dishes, and an overall less pleasant cooking experience.
Tools and Materials Needed
To get started, you’ll need a few basic tools and materials - A new oven door seal (specific to your oven model) - A flathead screwdriver - A pair of scissors (if adjustments are needed) - A damp cloth for cleaning
You can usually find a suitable replacement seal online or at a local appliance store. Be sure to consult your oven’s manual or manufacturer’s website for the exact specifications required for your model.
Step-by-Step Replacement Process
1. Unplug the Oven Safety first! Before starting any repair work, ensure that your oven is unplugged from the power source or, if it’s a gas oven, turn off the gas supply.
chef oven door seal replacement

2. Remove the Old Seal Open the oven door fully. Inspect the old seal to locate how it’s attached. Most oven seals are either held in place by a groove or secured with clips. Use the flathead screwdriver to loosen and remove any clips if necessary. Carefully pull the old seal away from the door, making sure not to damage the door's interior.
3. Clean the Area Once the old seal is removed, clean the area around the door where the seal was located. Use a damp cloth to remove any debris or grease. This step is crucial as it ensures a proper fit for the new seal.
4. Install the New Seal Take the new oven door seal and position it in the same groove where the old one was located. Start at one corner and gradually work your way around the door. Ensure the seal is seated evenly and securely. If your seal comes with clips, make sure to attach them as per the instructions.
5. Trim if Necessary In some cases, the new seal may be slightly too long for your oven. If you find that the seal does not fit perfectly, use scissors to trim it to the appropriate length. Make sure to cut it evenly to maintain a uniform fit.
6. Test the Seal Once the new seal is in place, close the oven door and press down gently around the edges to ensure it forms a tight seal. You can also test the seal by holding a piece of paper between the door and the oven frame; if you can pull it out easily with the door closed, the seal may not be installed correctly.
7. Plug the Oven Back In Reconnect your oven to its power source or turn the gas supply back on. Preheat it to check if it maintains the desired temperature efficiently.
Conclusion
Replacing the seal on your chef oven door is a straightforward task that can significantly enhance your cooking experience. With a few simple steps, you can ensure your oven operates efficiently, saving you time and energy in the kitchen. Regular maintenance, including checking the oven door seal, will contribute to the longevity of your appliance and help ensure delicious meals for years to come.
-
Under Door Draught Stopper: Essential ProtectionNewsJul.31,2025
-
Garage Door Seal and Weatherstrips for ProtectionNewsJul.31,2025
-
Edge Banding Tape for Perfect EdgesNewsJul.31,2025
-
Table Corner Guards and Wall Corner ProtectorsNewsJul.31,2025
-
Stair Nose Edging Trim and Tile Stair SolutionsNewsJul.31,2025
-
Truck Bed Rubber Mats for Pickup BedsNewsJul.31,2025
-
Window Weather Stripping for Noise ReductionNewsJul.29,2025