Telephone: +8618730949119
E-mail: 1299343081@qq.com
Feb . 13, 2025 22:13
Back to list
how to replace oven door seal
Replacing an oven door seal may not be a daily task, but it's an essential one that can significantly impact your cooking results and power efficiency. A well-fitted oven door seal ensures your oven maintains the right temperature, reducing energy wastage and ensuring evenly cooked meals. Here’s a comprehensive guide on the process of replacing an oven door seal, drawing on expertise, reliability, and professional insights.
With the groove cleaned, align the new seal. Begin by fitting it into the groove in one corner, pressing firmly but carefully around the perimeter of the door. If your seal comes with clips, ensure these are properly aligned with the corresponding holes. Take your time to work around the door, making sure the seal is lying flat and snug within the groove or clipped securely. A well-fitted seal should show no signs of being twisted or bunched up. Additionally, check that the seal is positioned evenly on all sides to avoid any strain when the door is shut. Close the oven door slowly, observing for any resistance which might indicate a misalignment. Once in place, test the seal's effectiveness. Preheat your oven to a moderate temperature, such as 350°F (175°C), and observe for any heat escaping. A successful installation will show no signs of heat leakage. In conclusion, replacing an oven door seal is a manageable task that can extend your oven's lifespan and improve cooking efficiency. By following expert guidance, you can ensure the new seal fits perfectly, maintaining your oven's performance and reliability. Moreover, regular maintenance of your oven seal is a testament to your commitment to appliance care, underlining a trustworthy approach to household management. By employing these practical and professional strategies, homeowners can confidently replace their oven door seals and benefit from improved appliance efficiency, ultimately leading to better cooking results and energy savings.
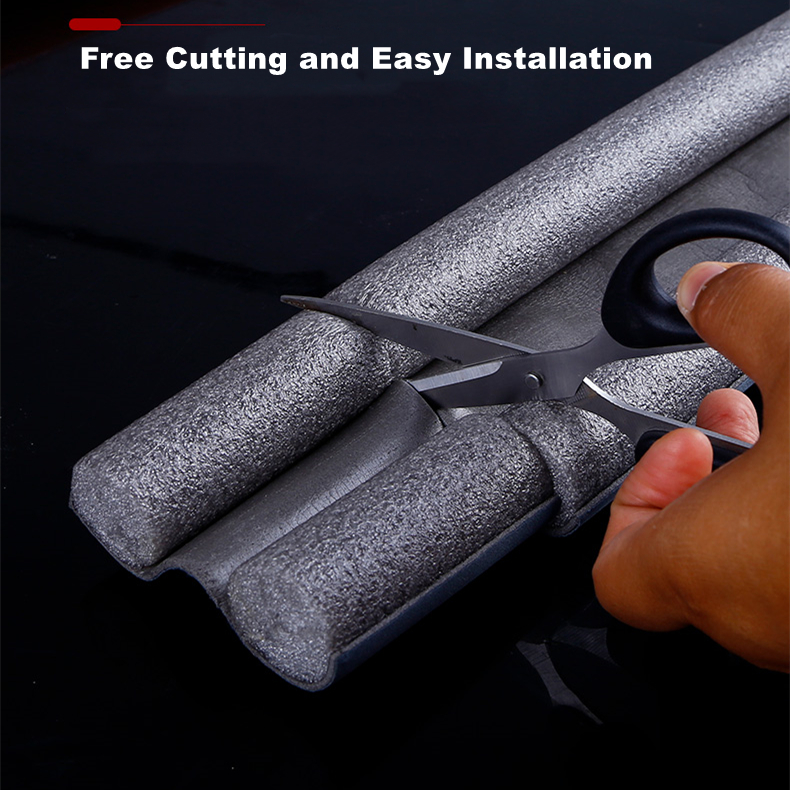
With the groove cleaned, align the new seal. Begin by fitting it into the groove in one corner, pressing firmly but carefully around the perimeter of the door. If your seal comes with clips, ensure these are properly aligned with the corresponding holes. Take your time to work around the door, making sure the seal is lying flat and snug within the groove or clipped securely. A well-fitted seal should show no signs of being twisted or bunched up. Additionally, check that the seal is positioned evenly on all sides to avoid any strain when the door is shut. Close the oven door slowly, observing for any resistance which might indicate a misalignment. Once in place, test the seal's effectiveness. Preheat your oven to a moderate temperature, such as 350°F (175°C), and observe for any heat escaping. A successful installation will show no signs of heat leakage. In conclusion, replacing an oven door seal is a manageable task that can extend your oven's lifespan and improve cooking efficiency. By following expert guidance, you can ensure the new seal fits perfectly, maintaining your oven's performance and reliability. Moreover, regular maintenance of your oven seal is a testament to your commitment to appliance care, underlining a trustworthy approach to household management. By employing these practical and professional strategies, homeowners can confidently replace their oven door seals and benefit from improved appliance efficiency, ultimately leading to better cooking results and energy savings.
Next:
Latest news
-
Under Door Draught Stopper: Essential ProtectionNewsJul.31,2025
-
Garage Door Seal and Weatherstrips for ProtectionNewsJul.31,2025
-
Edge Banding Tape for Perfect EdgesNewsJul.31,2025
-
Table Corner Guards and Wall Corner ProtectorsNewsJul.31,2025
-
Stair Nose Edging Trim and Tile Stair SolutionsNewsJul.31,2025
-
Truck Bed Rubber Mats for Pickup BedsNewsJul.31,2025
-
Window Weather Stripping for Noise ReductionNewsJul.29,2025