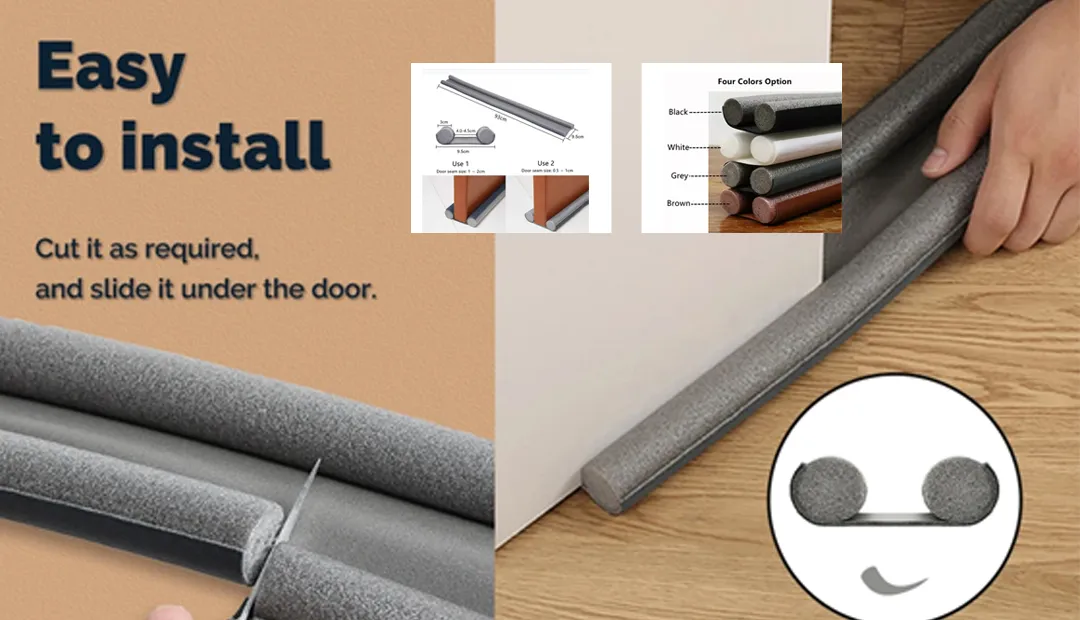
installing weather stripping
Installing Weather Stripping A Comprehensive Guide
Weather stripping is an essential home improvement technique that can significantly enhance your home’s energy efficiency, reduce utility bills, and improve overall comfort. By preventing drafts and air leaks, weather stripping creates a more stable indoor environment, shielding your living space from the elements. In this guide, we will explore the advantages of weather stripping as well as provide a detailed step-by-step approach to installing it effectively.
Benefits of Weather Stripping
1. Energy Efficiency One of the primary benefits of weather stripping is its ability to prevent conditioned air from escaping your home. This leads to reduced energy consumption as your heating and cooling systems don’t have to work as hard, ultimately lowering your energy bills.
2. Enhanced Comfort Weather stripping creates a more consistent indoor temperature, reducing drafts that can make certain areas of your home uncomfortable. This is especially beneficial during extreme weather conditions, like winter chills and summer heat.
3. Noise Reduction Alongside temperature control, weather stripping can help in diminishing external noise. Sealing gaps can minimize sound travel, resulting in a quieter living environment.
4. Increased Lifespan of HVAC Systems By reducing the workload on your heating and cooling systems, weather stripping can extend their lifespan, allowing you to avoid costly replacements and repairs.
5. Environmental Impact Using less energy not only saves you money but also reduces your carbon footprint. By investing in weather stripping, you contribute to a more sustainable home.
Types of Weather Stripping
Before diving into the installation process, it’s essential to familiarize yourself with the various types of weather stripping available
- V-Strips Also known as tension seals, these are flexible strips that can be applied to the sides of windows and doors. - Felt Strips Made from compressed wool or synthetic fibers, these are ideal for areas with little to no moving parts and provide good insulation. - Foam Tape This easy-to-install option is excellent for uneven surfaces and offers a great deal of flexibility. - Rubber/Plastic Gaskets These materials are durable and suitable for use around windows and doors where maximum sealing is needed. - Door Sweeps Installed at the bottom of doors, these strips help prevent drafts from entering under the door.
Tools and Materials Needed
Preparing for the installation is crucial. You will need the following tools and materials
installing weather stripping

- Weather stripping material of your choice - Measuring tape - Utility knife or scissors - Caulk (if needed) - Cleaning supplies (e
.g., a cloth for dusting) - Hammer and finish nails (for certain types of weather stripping)Step-by-Step Installation Guide
1. Assess Your Needs Identify the areas in your home that require weather stripping. Check windows and doors for drafts by holding your hand near edges on a windy day.
2. Measure Use a measuring tape to measure the length of the gaps you intend to seal. Be sure to note specifics such as the height and width of doors and windows.
3. Choose the Right Weather Stripping Based on your measurements and the type of gaps, select the most suitable weather stripping material.
4. Clean the Surface Before applying weather stripping, clean the surfaces thoroughly to ensure the adhesive sticks properly. Remove old weather stripping, dust, and debris.
5. Cut to Size Cut the weather stripping material to the appropriate lengths using a utility knife or scissors.
6. Install Follow the manufacturer’s instructions for applying the weather stripping. For adhesive types, press firmly into place and ensure it's secure. For mechanical types (like door sweeps), fix them in place using screws or nails.
7. Check Seals After installation, check all seals. Close the door or window to ensure a snug fit without gaps. Make adjustments if needed.
8. Final Inspection After everything is set, do a final check during a windy day or with a candle flame to ensure no drafts are present.
Conclusion
Installing weather stripping is a straightforward yet immensely beneficial task that can dramatically improve your home’s comfort and efficiency. With just a few tools and materials, you can tackle this project and enjoy the immediate benefits. Remember, taking the time to properly install weather stripping will not only enhance your living environment but also provide long-term savings and sustainability. So gather your materials, roll up your sleeves, and start sealing those drafts!
-
Under Door Draught Stopper: Essential ProtectionNewsJul.31,2025
-
Garage Door Seal and Weatherstrips for ProtectionNewsJul.31,2025
-
Edge Banding Tape for Perfect EdgesNewsJul.31,2025
-
Table Corner Guards and Wall Corner ProtectorsNewsJul.31,2025
-
Stair Nose Edging Trim and Tile Stair SolutionsNewsJul.31,2025
-
Truck Bed Rubber Mats for Pickup BedsNewsJul.31,2025
-
Window Weather Stripping for Noise ReductionNewsJul.29,2025