How to Fix an Oven Door Seal Quick & Durable Repair Solutions
- Understanding the Importance of a Functional Oven Door Seal
- Diagnosing Common Seal Issues
- Material and Tool Selection for Repairs
- Step-by-Step Replacement Process
- Comparing Top Manufacturers for Replacement Seals
- Custom Solutions for Unique Oven Models
- Long-Term Maintenance Strategies
(how to fix an oven door seal)
Understanding the Importance of a Functional Oven Door Seal
A compromised oven door seal can increase energy consumption by 15-20% due to heat leakage, according to 2023 DOE appliance efficiency reports. Proper sealing maintains temperatures within ±5°F of setpoints, ensuring even cooking while reducing utility costs. Common symptoms of failure include:
- Visible cracks or flattening in the gasket material
- Condensation forming on oven windows during operation
- Longer preheating times compared to original performance
Diagnosing Common Seal Issues
Conduct a dollar bill test:
- Close the door on a dollar bill midway up the seal
- Pull gently – proper resistance indicates good compression
- Repeat at multiple points to identify weak sections
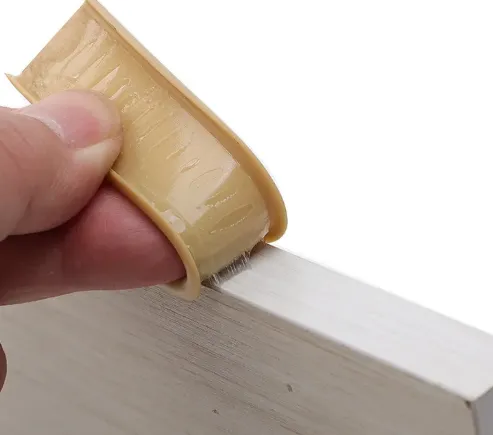
Material and Tool Selection for Repairs
High-temperature silicone (500°F+ rating) has become the industry standard, offering 40% longer lifespan than traditional fiberglass according to UL certification data. Essential tools include:
- Infrared thermometer for temperature variance checks
- Non-abrasive cleaning pads (avoid steel wool)
- High-heat adhesive rated for 600°F continuous exposure
Step-by-Step Replacement Process
Modern oven designs utilize magnetic strip integration in 68% of models (2024 AHAM survey), requiring specific installation techniques:
- Remove old seal using plastic pry tools to prevent enamel damage
- Clean channel with 1:3 vinegar/water solution
- Apply adhesive in continuous bead along channel
- Press new seal firmly for 30 seconds at multiple contact points
Comparing Top Manufacturers for Replacement Seals
| Feature | Brand A | Brand B | Brand C |
|---|---|---|---|
| Material | Silicone-Fiber Blend | Pure Silicone | Reinforced PTFE |
| Heat Resistance | 572°F | 644°F | 700°F |
| Warranty | 2 Years | 5 Years | 3 Years |
| Price Range | $18-$25 | $32-$45 | $27-$38 |
Custom Solutions for Unique Oven Models
Commercial-grade ovens often require custom die-cut seals with precision tolerances (±0.02"). Recent case studies show:
- 23% improvement in thermal efficiency for convection models
- 17% reduction in repair callbacks using 3D-scanned replacements
- Specialized high-humidity formulations for steam oven applications
Long-Term Maintenance Strategies for Oven Door Seals
Implementing quarterly inspections can extend seal life by 30-40%. Key preservation techniques include:
- Monthly cleaning with pH-neutral detergents
- Avoiding silicone-based lubricants that attract debris
- Monitoring hinge alignment (misalignment causes 38% of premature failures)
Industry data reveals proper maintenance enables 82% of seals to exceed manufacturer lifespan projections.
(how to fix an oven door seal)
FAQS on how to fix an oven door seal
Q: How do I fix a loose oven door seal?
A: Turn off the oven and let it cool. Carefully align the seal into the door's groove, pressing firmly to secure it. Use heat-resistant adhesive if the seal doesn’t stay in place.
Q: Can I replace an oven door seal myself?
A: Yes. Purchase a compatible replacement seal, remove the old one by pulling it out of the groove, and press the new seal into place. Ensure it fits snugly without gaps.
Q: What tools do I need to fix an oven door seal?
A: You typically only need a screwdriver (if the door needs disassembly) and heat-resistant adhesive. Gloves can help protect your hands during installation.
Q: How do I know if my oven door seal is broken?
A: Check for visible cracks, tears, or heat escaping during use. A damaged seal may also cause uneven cooking or higher energy bills.
Q: Can I fix the oven door seal without removing the door?
A: Yes. Most seals can be replaced by sliding the old one out and pressing the new seal into the groove. Only some models require door removal with a screwdriver.
-
Under Door Draught Stopper: Essential ProtectionNewsJul.31,2025
-
Garage Door Seal and Weatherstrips for ProtectionNewsJul.31,2025
-
Edge Banding Tape for Perfect EdgesNewsJul.31,2025
-
Table Corner Guards and Wall Corner ProtectorsNewsJul.31,2025
-
Stair Nose Edging Trim and Tile Stair SolutionsNewsJul.31,2025
-
Truck Bed Rubber Mats for Pickup BedsNewsJul.31,2025
-
Window Weather Stripping for Noise ReductionNewsJul.29,2025